


Throughout Part II of this book, you've been writing applets that demonstrate the various features of the Java language. Along the way, you learned a few things about how applet works, including how Java calls the init() method when the applet starts, how the paint() method draws the applet's display, and how Java calls the action() method in response to some action by the user (for example, pressing Enter when typing in a TextField object). In this chapter, you'll extend your knowledge of applets by looking more closely at the construction of an applet, as well as discovering some other methods that are important to Java applets.
The Java programming language and libraries enable you to create applets that are as simple or as complex as you like. In fact, you can write the simplest Java applet in only a few lines of code, as shown in Listing 15.1.
Listing 15.1 MyApplet.java: The Simplest Java Applet.
import java.applet.*;


public class MyApplet extends Applet

{

}
The first line of Listing 15.1 tells the Java compiler that this applet will be using some or all of the classes defined in the applet package (the asterisk acts as a wildcard, just as in DOS file names). All of the basic capabilities of an applet are provided for in these classes, which is why you can create a usable applet with so few lines of code.
The second line of code declares a new class called MyApplet. This new class is declared as public so that the class can be accessed when the applet is run in a Web browser or in the Appletviewer application. If you fail to declare the applet class as public, the code will compile fine, but the applet will refuse to run. In other words, all applet classes must be public.
As you can see, you take advantage of object-oriented programming (OOP) inheritance to declare your applet class by subclassing Java's Applet class. This inheritance works exactly the same as when you created your own classes in Chapter 14, "Classes." The only difference is that Applet is a class that's included with the Java Developer's Kit (JDK), rather than a class you created yourself.
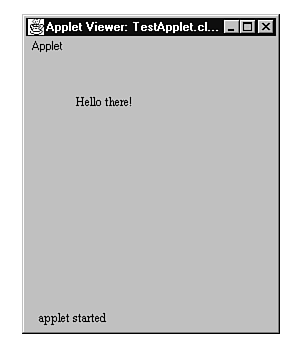
You can actually compile the applet shown in Listing 15.1. When you do, you'll have the MyApplet.class file, which is the byte-code file that can be executed by the Java system. To run the applet, just create an HTML document like the one shown in Listing 15.2. You've already used similar HTML documents with the many applets you created in part II of this book. However, if you need a refresher course on using the <applet> tag, turn back to Chapter 2 "Running Java Applets." If you were to run the MyApplet applet, however, you wouldn't see anything much in Appletviewer or in your Web browser.
Listing 15.2 MYAPPLET.htmL: MyApplet's HTML Document.
<title>Applet Test Page</title>

<h1>Applet Test Page</h1>

<applet

    code="MyApplet.class"

    width=250

    height=250

    name="MyApplet">

</applet>
Every Java applet you create inherits a set of default behaviors from the Applet class. In most cases, these default behaviors do nothing, unless you override some of Applet's methods in order to extend the applet's basic functionality. However, although a simple applet like MyApplet in Listing 15.1 doesn't seem to do much, a lot is going on in the background. Some of this activity is important to your understanding of applets, and some of it can stay out of sight and out of mind.
Part of what goes on in a simple applet is the execution of the applet's life cycle. There are five parts to this cycle, each of which has a matching method that you can override to gain access to that cycle of the applet's life. The five stages of an applet's life cycle are listed here:
| NOTE |
To be entirely accurate, the paint stage isn't considered an actual applet life cycle, but because an applet without a display is likely useless (not always, though), I thought I'd include the paint cycle. Truth is, the paint() method isn't even defined in the Applet class. Rather, Applet inherits paint() from the Component class, a superclass in Applet's long chain of inheritance, which goes from Applet to Panel to Container and finally to Component. |
All this talk about life cycles and overriding methods may have left you a little confused as to how all this actually applies to the applets you want to create. In previous chapters, you managed to create applets without dealing with most of this stuff because the Applet class, from which you derived your own applet classes, handled the life-cycle methods in the default manner proscribed by the Java system. If you look at Listing 15.3, you'll see a small applet that overrides all the methods needed to provide custom behaviors for all the applet's life-cycle stages.
Listing 15.3 MyApplet2.java: Overriding the Applet Life-Cycle Methods.
import java.applet.*;

import java.awt.*;


public class MyApplet2 extends Applet

{

    public void init()

    {

        // Place initialization cycle code here.

    }


    public void start()

    {

        // Place start cycle code here.

    }


    public void paint(Graphics g)

    {

        // Place paint cycle code here.

    }


    public void stop()

    {

        // Place stop cycle code here.

    }

public void destroy()

    {

        // Place destroy cycle code here.

    }

}
Notice that in order to override the paint() method, you must import the java.awt.* libraries, which contain information about the Graphics class. As you learned when writing previous applets in this book, the Graphics class enables you to display information and graphics in an applet's display area (or canvas, as the display area is sometimes called).
If you look for the previous methods in Java's source code, you'll discover that the default implementations of init(), start(), paint(), stop(), and destroy() all do nothing at all. If you want your applet to do something in response to these cycles, you have to provide the code yourself by overriding the appropriate method.
In this chapter, you got a quick look at the basic applet and the methods you can call at various stages during the applet's life cycle. Over the rest of the chapters in this book, you'll use this knowledge to develop applets that can do anything from display text in various fonts to execute animation sequences with sound.